Approved by leading automobile manufacturers


TIME-SERT® inserts are a thin wall solid bushing insert. This guarantees easy installation and allows for full load use of tapped hole, ensuring protection against stress and vibration.
TIME-SERT® inserts are “timed” internal to external which gives a very thin wall thickness which means TIME-SERTs can be installed in areas of limited space and clearance.
TIME-SERT® being a solid bushing insert gives it added strength, easily withstands high temperatures without damage or deforming. TIME-SERT® inserts have no prongs or tangs to break off or deal with down in the hole, which can be a problem in deep holes.
TIME-SERT® inserts are self-locking having an actual locking feature which will prevent them from coming out when a bolt is removed. On installation the bottom few internal threads of the insert are cold rolled to expand into the mating external threads of the base material locking the insert in place.
TIME-SERT® inserts have a flange, which will give them a positive placement on installation for “accurate specific depths”. This ensures that the insert does not wind down into the threaded hole.
Thin wall, self locking , solid bushing insert with positive placement .
Customers have asked if they may also use Loctite® adhesives for additional strength. Yes you may due to the solid wall design. There is no danger of loctite passing thru the threads of the insert and locking up the bolt as in coil types. Time-Sert inserts are used in Aluminum, cast iron, steels and even some hard plastics. MADE IN THE USA
click here for close up tooling video
Check the correct size and pitch for your bolt. We have a Printable bolt chart in metric click here in inches click here.
Printable bolt charts must be printed with scaling set to NONE.
Click links for material specifications in PDF format.
12L14 Carbon Steel (click here)
303 Stainless Steel (click here)
2024 T351 Aluminum (click here)
A basic dimension we give is .250 inches or 6.3mm deeper hole, than the insert itself.
This is the relief angle length of the tap we have to account for to get a full thread.
This can vary as small taps will have shorter relief angle length than larger taps.
Again this is the length from the tip of the tap to the first “full” thread.
The extra depth also gives us enough room for the install driver to slightly pass thru the bottom of the insert to expand the last few threads, locking it in place.
Example. The blind hole depth for a 5/16-18x.450 should be a minimum of .700 inches or 17.8mm deep.
Insert length .450 + relief angle of tap .250 =.700 inches or 17.8mm Hole Depth.
Another thing to keep in mind when repairing a blind hole application is that you “do not” want to bottom out the driver tool on installation. There is a simple method to safeguard against bottoming the tool out, by placing a visual mark the driver tool.
BEFORE installing the insert, place the driver tool into the hole and mark the tool at the point it can’t enter any further. Use a ink marker or even use a small strip of electrical tape around the driver. This way we know exactly how deep the hole is and there is no danger of bottoming the tool out.
Not recommended to use ez-out or screw extractor on BIG-SERT because of the locking pin at the bottom of BIG-SERT it will create a cam lock effect. Drill out BIG-SERT’s.
Link: Screw Extractors
TIME-SERT will state that if the thread repair is done correctly and with the proper length of insert used for the application e.g. the insert is the same length of the original thread engagement, the result should be a hole that should match the original torque specification of the hole.
Customers have found in their own testing data that TIME-SERT’s have exceeded their expectations. Many of our larger customers will test TIME-SERT’s before placing them in critical applications and find excellent results.
Measure from either the spark plug (Washer) or (taper) to the last thread. (Not to the end of the electrode). This will give you the correct length on insert. TIME-SERT inserts cannot be shortened for length. Please refer to our catalog or web site for length of inserts.
The diameter of the spark plug will be the size. The threads or pitch will be a standard for the diameter. Example if the diameter is M14 the standard pitch will be 1.25 or M14x1.25.
If you can provide the spark plug number or make, model, year, liter of vehicle we can give you a part number for the kit and insert required. Use form at the right.
link to: Sparkplug page
Ford spark plug Repair kit p/n 5553 to repair blown out sparkplug’s. Ford Triton Sparkplug repair kit includes all the tools and 5 inserts.
Link: INCH ENGINEERING DATA PAGE
Link: METRIC ENGINEERING DATA PAGE
If the hole is bigger refer to our Big-Sert line for oversized holes . BIG-SERT information page
Read more about shorter hole depth on question 22.
S.T.I stands for “Screw Thread Insert” an example would be a TIME-SERT M8x1.25 repair kit would require a M8x1.25 S.T.I tap, this is “larger” than a standard M8x1.25.
S.T.I TAPS are a mathematical formula from a nominal size thread.
S.T.I Basic P.D. = Nominal Thread O.D (Basic Major Dia.) – Basic P.D. + Basic Major Dia.
Example for a “1/2-20” S.T.I tap:
S.T.I “1/2-20” O.D =.500 Dia. – P.D .4675 + O.D .500 = .5325 S.T.I Basic P.D
Taps are generally class 3 (4H limit)
Our taps are made from M2 high speed tool steel.
In the year 2000 the North Star block had a change where the lower bank head bolts
were dropped to a deeper depth. Kit p/n J-42385-2000
The NorthStar BIG-SERT kit will repair the 4.0/4.6 along with the NorthStar 2000 block which have a deeper depth on the lower bank of the block. Since the BIG-SERT repair came several years later we decided to consolidate the two. The BIG-SERT kit p/n J-42385-500BS is for blocks that have already been repaired! This is a second oversized repair.
Question: What if i have a NorthStar J-42385-500 kit and want to fix a NorthStar 2000?
Is it possible to do a 2000 repair with my J-42385-500 kit ?
Answer: Yes, this can be done by remarking the tools for the deeper depth on the lower bank of the 2000.
Core Drill: The Core Drill has a positive stop collar, remove the silicone in the set screw and back up the collar starting from the larger cutting diameter (not the tip of drill) back toward the square, this should measure 3.100 inches.
Tap: Mark a line from the cutting edge of tap back toward the square 4.550 inches.
Driver: Mark a line from the front of driver back toward the square 3.550 inches.
Picture of new marking of tools: J-42385-500 to J-42385-2000
Note: Additional bolt length would be required for deep holes on the lower bank of the 2000 blocks. Attachment bolts p/n J-42385-604 quantity 2 would be required to attach the fixture plate to the engine block. The correct kit for the NorthStar 2000 is our p/n J-42385-2000.
Aluminum pan repair:
If the drain pan is aluminum use kit 1415C, it does not matter if there are oversized drain plugs used because we are drilling out the hole to bring it back to its original size. Aluminum pans normally have enough material to drill out and insert back to the standard M14x1.5 just make sure the oversized drain plug O.D outside diameter is not larger than .578 inches.
One possible suggestion on this type of installation.
1) Drill hole (2) Tap hole (3) let insert set up with locktite (4) install insert (5) file insert flush.
Drill the hole out, “DO NOT” use counterbore tool, tap the hole.
On installation: Screw the insert in the hole with loctite to the desired location. Let the insert set up with the loctite before running the insert driver tool through the insert. The loctite will prevent the insert from going to deep into the prepared hole.
Use the driver tool to expand the last few threads of the inserts.
The insert will now be protruding or sticking up higher in the hole, you will have to “file down” or mill the top of the insert to get the insert flush with the surface. It’s recommended to run the insert driver back through the insert to clean any burs at the top of the insert. The repair is complete.
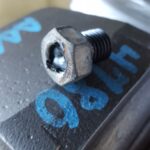
The bolts on this print out will probably not look like your bolt or drain plug, that’s not a problem as we are only looking at the “Threads” Size and Pitch.


Page Scaling NONE or in Adobe it would be Actual size.
Metric
Click Here for: Printable Metric Bolt chart. Set print scaling to NONE or Actual size
Charts must be printed and use scale check after printing on page.
If the chart does not open in Chrome or Firefox try Internet explorer.
Printable Metric Thread Pitch Gauge
Inch
Click Here for: Printable Inch Bolt chart. Set print scaling to NONE or Actual size
Charts must be printed and use scale check after printing on page.
If the chart does not open in Chrome or Firefox try Internet explorer.
Printable Inch Thread Pitch Gauge
Rule – This is a printable 8” rule for metric and inch.
Fractional/Decimal chart – Fractional / Decimal chart.
You can also bring the bolt to your local fastener house in your area, they will be able to measure it for you. You will need to know the thread size and pitch of the bolt to repair it.
The tool in the link above can be purchased through SPX corp.
(507)-455-7206 p/n PT6575
Possible work around:
Place a suitable bolt that will fit closely into Dowel so that it will not crush.
Use a pair of vise grips to hold on the “outside” of the dowel. Slowly work the dowel back and forth as you use slight pressure under the vise grip with a screw driver to give up lift.
Use care not to scratch the top of block in the process.
Sometimes head alignment dowels will come out easy and sometimes hard depending on tolerances of the block, how much the dowel gets crushed in the process, or rust, etc.
Link to picture of work around.
Items may be returned at no additional charge within the first 30 days with original invoice.
After 30 days there will be a 25% restocking fee applied. We do not refund shipping costs.
You must have a copy of the original invoice. Items more then 6 months old or special order items are non returnable. Do not send us used items, used items will not be credited.
Shortage or discrepancy in shipment:
Any claims for Discrepancies in shipment must be made within one week of receipt of merchandise or no credit will be issued.
Warranty:
The following is made in lieu of all warranties, expressed or implied.
There are no warranties. Seller’s only obligation shall be to replace such quantity of the product proved to be defective and Only by approved vendors. Seller shall not be liable for any injury, loss, or damage, direct or consequential, arising out of the use or the inability to use the product. Before using, user shall determine the suitability of the product for their intended use, and the user assumes all risk and liability whatsoever in connection therewith. The foregoing may not be changed.
Time Fastener Co. expressly retains the right to make changes or discontinue any product it manufactures or sells at any time and without notice.
Terms and conditions:
Distributors placing orders in the USA have a $20.00 min order overseas $50.00 min. Drop ship fee $5.00.We will only drop ship in the United states. Restocking fee 25% after 30 days on returns. Map Pricing: Distributors must sell Time-Sert and Big-Sert products at list price. Any distributor found to be in violation of this term will lose their distributorship and we will not sell to them. If a distributor supports a third party who undercuts our approved distributors map pricing they will lose their distributorship. Distributors will not rent or offer used tooling. If we find a distributor selling or renting used tooling we will no longer sell to them. Distributors must not list individual tools for sale. Payment Terms are NET 30 days on open accounts. If a distributor is out of terms more than 30 days we reserve the right to hold all orders until payment is current or terminate distributorship if they continue to pay out of terms . If pricing on distributors purchase order does not match Time Fastener Co. pricing the item will not be shipped until corrected on purchase order. We add 3% to invoice for credit card sale. Prices are subject to change if there is a change in the industry. The max number of individual tools in one size that can be ordered is 20 pcs. Terms and conditions may be updated at anytime for any reason. By placing an order you agree to the terms and conditions.
TIME-SERT® and BIG-SERT® are registered trade marks no duplications are permitted.
If TIME-SERT or TIMESERT or any variation is used in your main URL this is a violation of our registered trademark and we will no longer sell to you. No redirects allowed.
Application Spark plug taper seat:
Our loctite p/n 6020 is required on taper seat spark plug inserts. Only the taper seat style spark plug inserts require loctite not washer seat. We are sealing on the built in taper of the insert so we have a perfect seal from the spark plug to the insert but we need to insure that the external threads of the insert are sealed by the loctite to keep any gases from passing by the external threads of insert as a precaution.
Application Head Bolt:
We recommend our loctite p/n 6020 on the external threads of the insert in head bolt applications and commonly include p/n 6020 in many head bolt kit applications.
Time-Sert Loctite p/n 6020 = Loctite p/n 266:
loctite 266 is recommened because of it’s higher temperture. Normal red loctite e.g. part numbers 277 or 271, burn away at 200 degrees which is the normal operating temperature of most engines.
Loctite our p/n 6020 has been tested to 500 degrees without any problems and will give added strength as it will not burn away when engine temperatures above 200 degrees are reached. picture p/n 6020 10ml bottle.
If repairing a straight or in line engine block TIME-SERT would recommend repairing all holes.
The reason for this is simply the weakest link effect. If you only repair the bad hole or holes and leave the others there is a very good chance the other non-repaired holes may fail.
Especially with aluminum blocks these days and over heating you can experience an anneal effect where the material becomes brittle. The only way to make sure is to remove all the old threads by replacing with steel inserts.
TIP: Clear packing tape
One last tip we like to mention is using clear packing tape normally used to close cardboard boxes. If you tape across all the holes on top of the cylinder block this will help keep all chips from entering the water jacket and piston holes. This way when the repair is finished you can easily remove the tape from the top of the block and be assured that no chips have entered. The clear packing tape is very thin and won’t be a problem pushing thru the alignment bolts included in the head bolt repair kits when starting the repair.
The video example shows the speed in which TIME-SERT inserts can be installed in a blind hole applications using a pneumatic push pull tapper. To our knowledge there is no insert on the market that can be installed faster in a hand volume application where a specific depth is required. The insert in the video is a M10x1.5x14mm.
Link to: Desoutter tools push pull tappers. D16-L 1000 p/n 1274624
![]() You should be able to order through your local Fastenal dealer.
You should be able to order through your local Fastenal dealer.
Tool Smith 205 323-2576 http://www.toolsmith.ws/ or Turner supply 251 431-0262
If multiple inserts need to be installed this can also be done using a CNC with a tapmatic reversing head.
Link to: Tapmatic self reversing tapping heads.
Please read link below.
Click Here for information on helicoil / Save-A-Thread spark plug failure
The problem that can happen is the reamer did not ream all the way thru the hole so it leaves a step in the hole that will STOP the tap because the 45 degree counterbore was not fully done. This can happen because of 2 possible things. The reamer is hitting a VALVE or the top of the PISTON which is stopping it from entering all the way.
Please check again that the valves are closed and the piston is all the way down, then your tap should easily tap all the way thru.
Follow the 2 man step on getting the valves closed and piston all the way down on the instructions.
Turn the engine over clockwise from the front use an 18mm socket.
Put your thumb in the hole like your giving someone the “thunbs down” the top of your knuckel should almost block the hole and you should feel compression as you come up on the compression stroke.
When you get to top dead center you won’t feel anymore pressure use a wire hanger put down the hole.
As someone slowly turns the engine again clockwise as it is going down on the power stroke the second it tries to come back up STOP. The valves will be closed and the piston all the way down.
NOTE: Use caution and try to not bend over the tool or Bottom the driver tool out in the hole. We suggest using a tap handle wrench when installing inserts. If using a 12 point socket on a ratchet, center the the palm of your hand over the square of the tool to keep the pressure centered when turning the driver tool.
Use Time-Sert driver oil p/n 6010 or 30 wt motor oil on the external threads of the driver when installing inserts.
1)Broken Driver 2) Tack nut 3) Remove Driver 4) Finished hole undamaged